


Introduction
MkDocs is a static site generator built on Python, specifically designed for creating documentation websites and allows users to write documentation in Markdown format which is then transformed into a beautiful and organized website. GitHub Pages, on the other hand, is a free hosting service provided by GitHub that allows you to publish static websites directly from your GitHub repository.
Together, MkDocs and GitHub Pages form a powerful combination for building documentation sites. MkDocs simplifies the process of creating and organizing the documentation content, while GitHub provides a hosting solution with collaboration and version control features.
This article provides an efficient and user-friendly approach to building and hosting your documentation site using MkDocs and GitHub Pages.
Prerequisites
Any code editor
The latest version of Python
The latest version of the Python Package Manager, pip.
A GitHub account
The latest version of Git
Basic knowledge of markdown
Getting Started / Setting up the Environment
Install Python and pip
Since MkDocs is built on Python, it requires the recent version of Python, and the Python package manager, pip to be installed on your device. To check that you have the latest version of Python and pip installed, run python --version and pip --version in your terminal.
However, if you do not have them installed, you can download the latest version of Python from here. Pip is most likely installed by default after installing Python, but if it's not you can run python get-pip.py to install Pip.
Create a GitHub Account and Install Git
You need to create a GitHub account to have access to GitHub pages. You can do that here.
Finally, you need to download and install the latest version of here, a version control that helps track changes in files.
Creating a new MkDocs project
Install MkDocs
To install MkDocs using pip, simply run pip install mkdocs in your terminal. You can confirm the success of the installation by running mkdocs --version.
Create and initialize a new MkDocs project
To create a new MkDocs project run mkdocs new [dir-name] where dir-name is whatever you want to name your project directory (my-project for instance). This command creates a directory containing a configuration file mkdocs.yml and a sub-directory docs which contains an index.md file. All your documentation source files will be stored in this directory.
To initialize the project, switch the directory to the main project directory by running cd my-project, and start the server by running mkdocs serve.
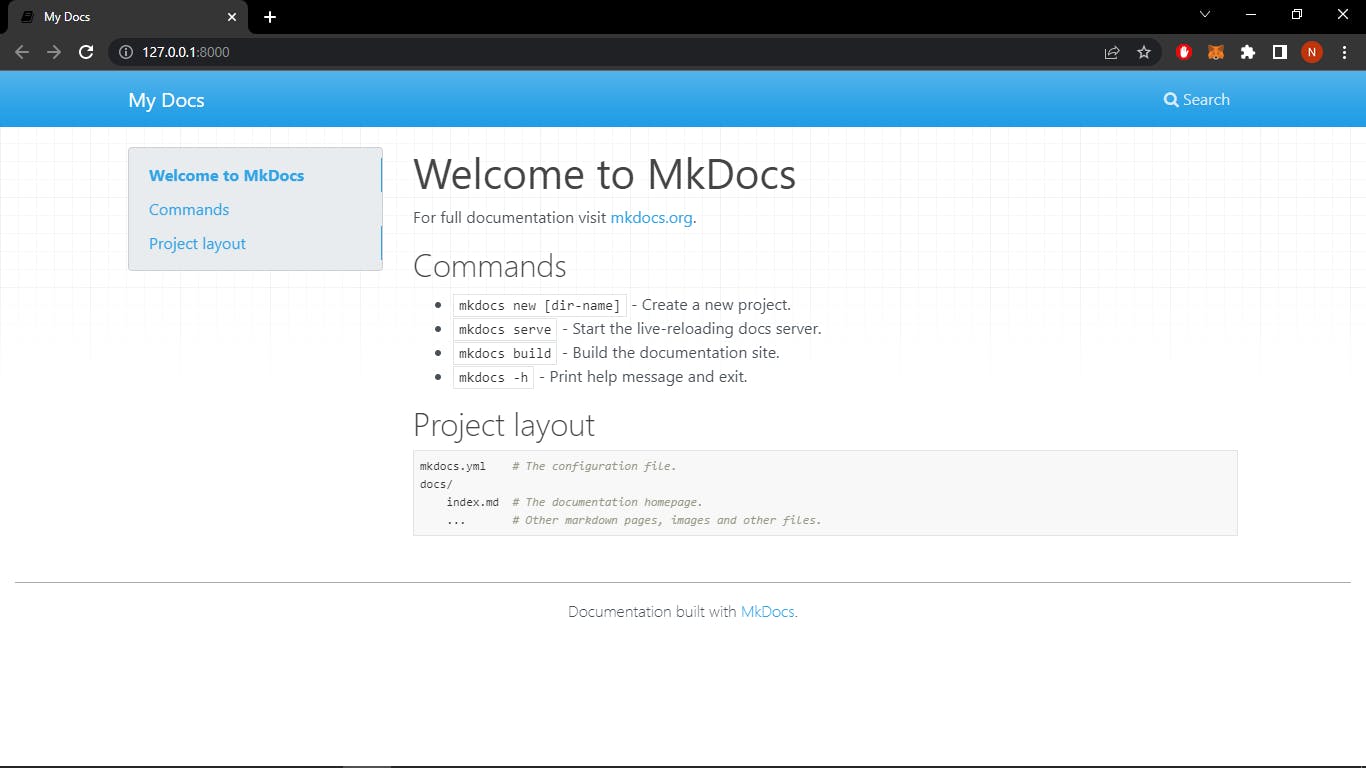
Open up http://127.0.0.1:8000/ in your browser, and you'll see the default home page being displayed:
Configuring the MkDocs YAML file
The MkDocs YAML file only has one parameter site-name which you can change to whatever you want. Add a site-url parameter which will point to the GitHub Pages url when you deploy the site. It can stay empty for now.
Adding pages and content
To add a page to the site, stop the server and run
curl 'https://jaspervdj.be/lorem-markdownum/markdown.txt' > docs/about.md`
This command creates an about.md page in the docs sub-directory. You can create as many pages as you want and populate them with your desired content.
Since the documentation site will include navigation headers, edit the configuration file and add some information about the order, title, and nesting of each page in the navigation header by adding a nav setting:
site_name: My Site
site_url:
nav:
    - Home: index.md
    - About: about.md
Save your changes and you'll now see a navigation bar with Home and About items on the left as well as Search, Previous, and Next items on the right.
Customization
Choose a theme
MkDocs has two built-in themes that you can apply to your documentation, the mkdocs default theme and the readthedocs theme. You can apply the readthedocs theme by adding a theme setting to the configuration file and setting it to readthedocs just like this:
theme: readthedocs
Start the server and your site will now look like this:

You can also access some third-party themes here and here.
Add logo and favicon
To change your favicon and logo, create an img sub-directory in the docs directory and copy your favicon.ico file to that directory. You can generate a favicon for free here.
Building and Testing the Site Locally
Before deploying the site to GitHub, you need to build the documentation site by running mkdocs build. This command creates a site directory that contains some new files and sub-directories.
Now that you have successfully built your documentation site. It is time to deploy the site for hosting!
Deploying the Documentation Site to GitHub Pages
Initializing a Git Repository
In your code editor, select 'Git Bash' from the terminal drop-down menu to use git:

Make sure you're in the root directory of your project.
Initialize the local directory as a Git repository by running the following command:
git init -b main
This initializes the repository and sets the name of the default branch to main.
Next, create a .gitignore file in the root directory of your project and add the site directory by simply typing /site in the file.
Add the files in your local repository and stage them for commit by running git add . in the terminal. Then run git commit -m "First commit". This command commits the tracked changes and prepares them to be pushed to a remote repository.
Creating a new GitHub repository
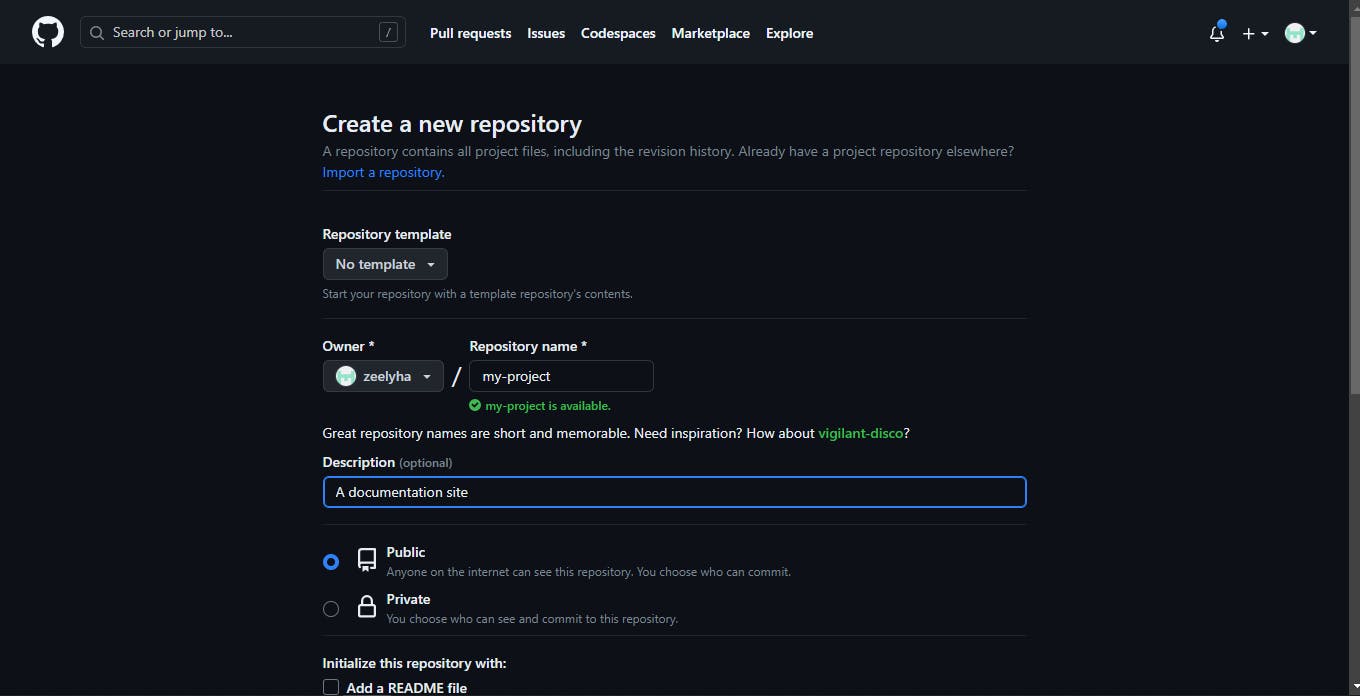
Create a new repository on GitHub without initializing a README, License or gitignore file.
Copy the remote repository URL and go back to your terminal.
Add the URL in the following format:
$ git remote add origin <REMOTE URL>
#This sets the new remote
$ git remote -v
#This verifies the new remote
Check out of the primary working branch, i.e. main by running git checkout main
Automating the Build and Deployment of the Site
After checking out of the primary working branch, switch the terminal from "Git Bash" to "Powershell" and run mkdocs gh-deploy.
This command enables MkDocs to build your docs and use the ghp-import tool to commit them to the gh-pages branch and push the gh-pages branch to GitHub.
…and you're done!
You can now up a browser and go to http://username.github.iorepository to view your documentation site.